


Are you constantly checking outdoor furniture and wondering why is it so expensive?! I’ve seen outdoor couches ranging from $3,000 & up!
I have been eyeing wooden outdoor furniture since last summer but the only thing that stopped me was the price tag.
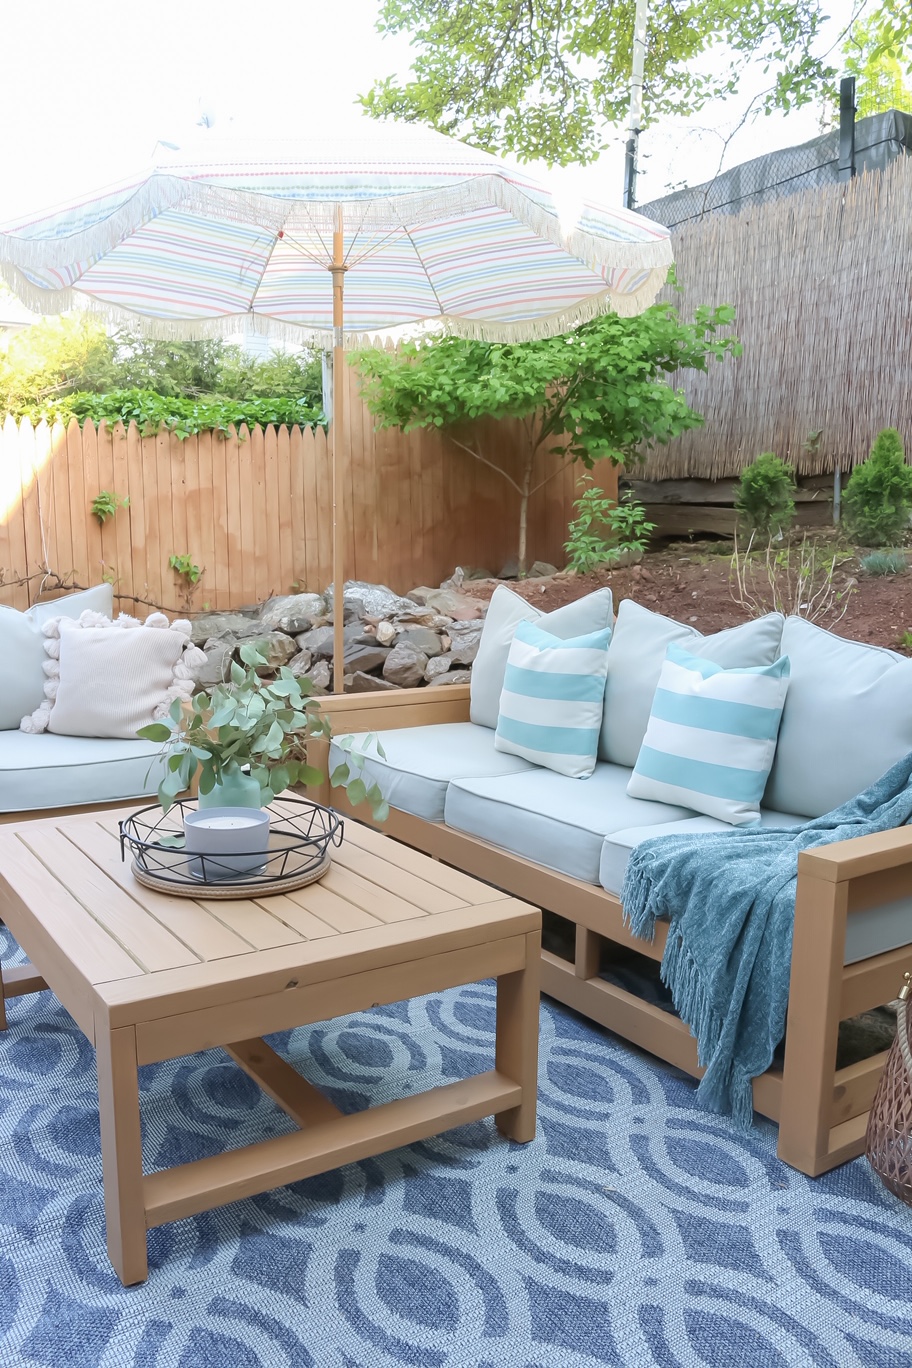
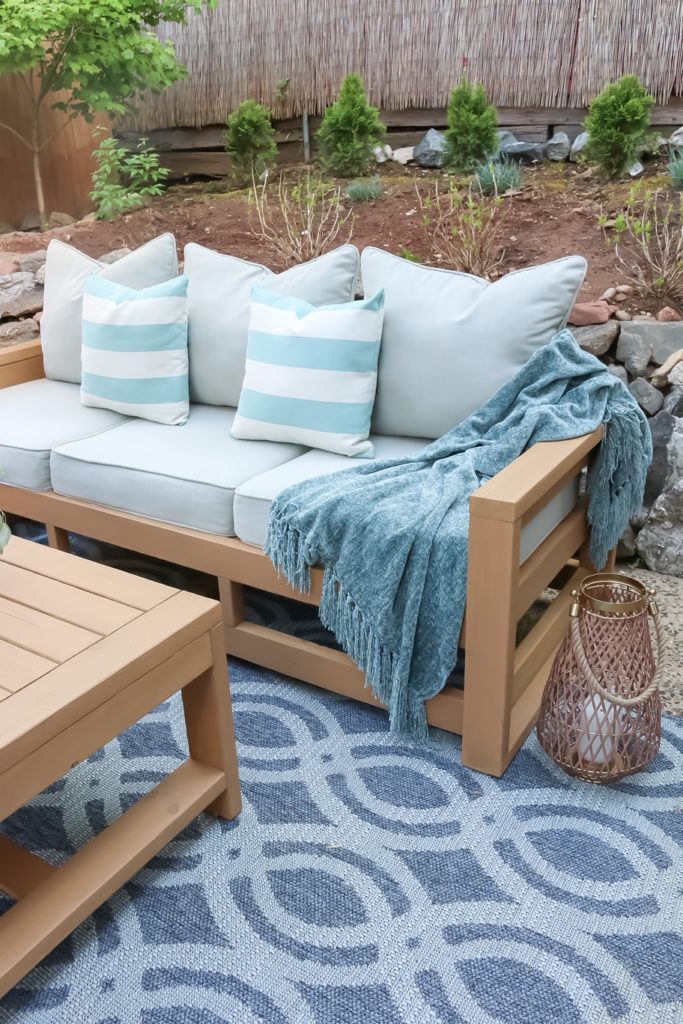
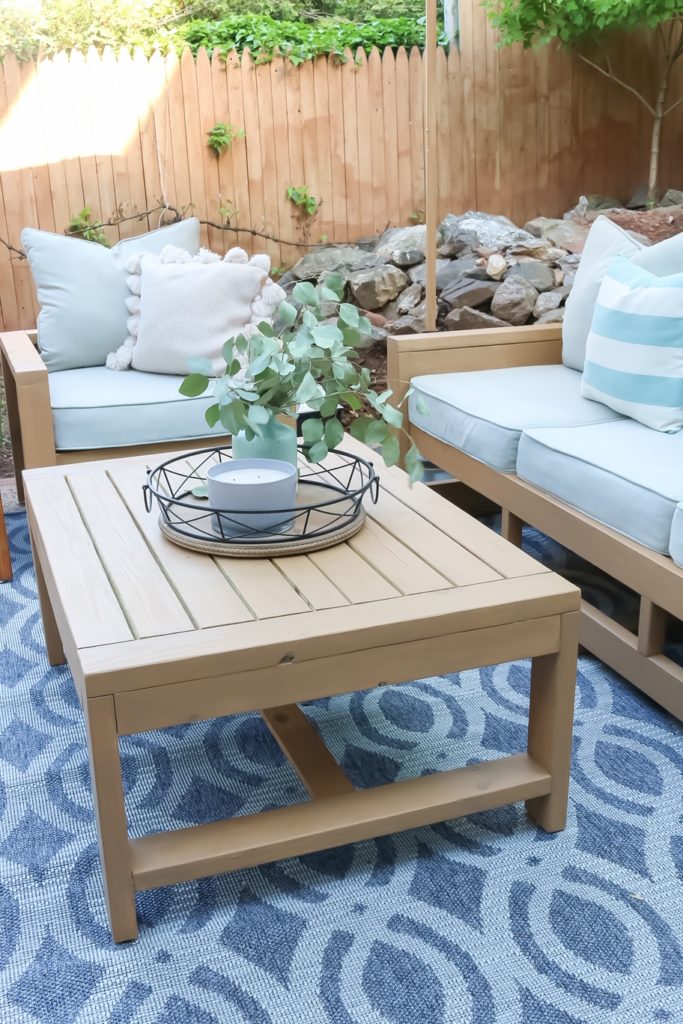
So this summer, we decided we will make our own set! A couch, a coffee table & two chairs. Just in time for the start of the summer!
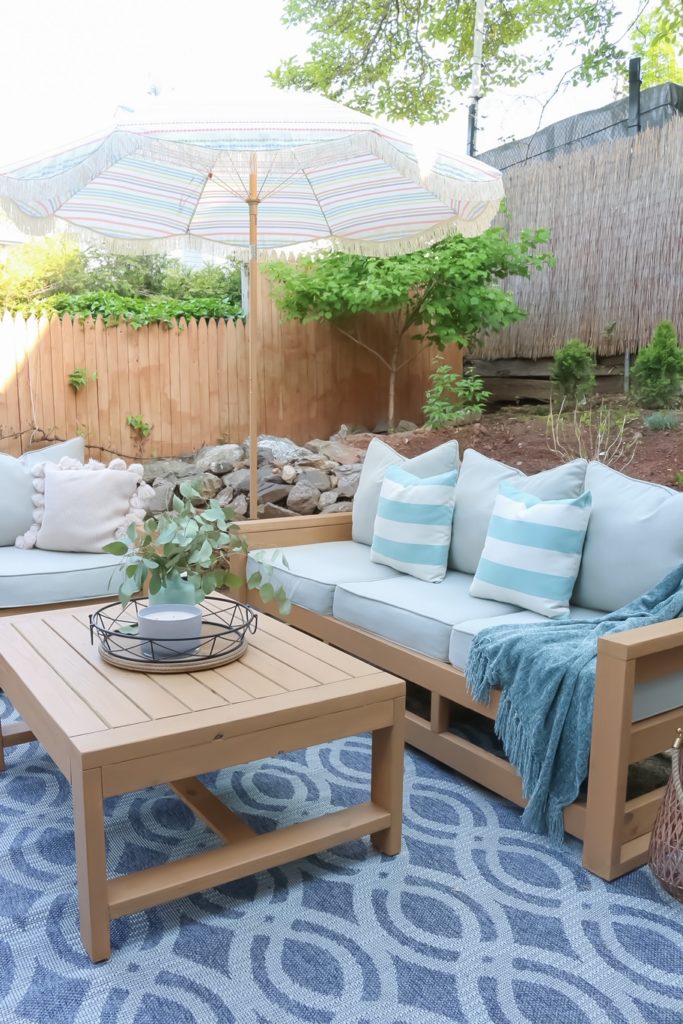
If you are looking to create an oasis in your backyard for this summer, consider building your own. You can customize the furniture to your needs & for a fraction of the price.
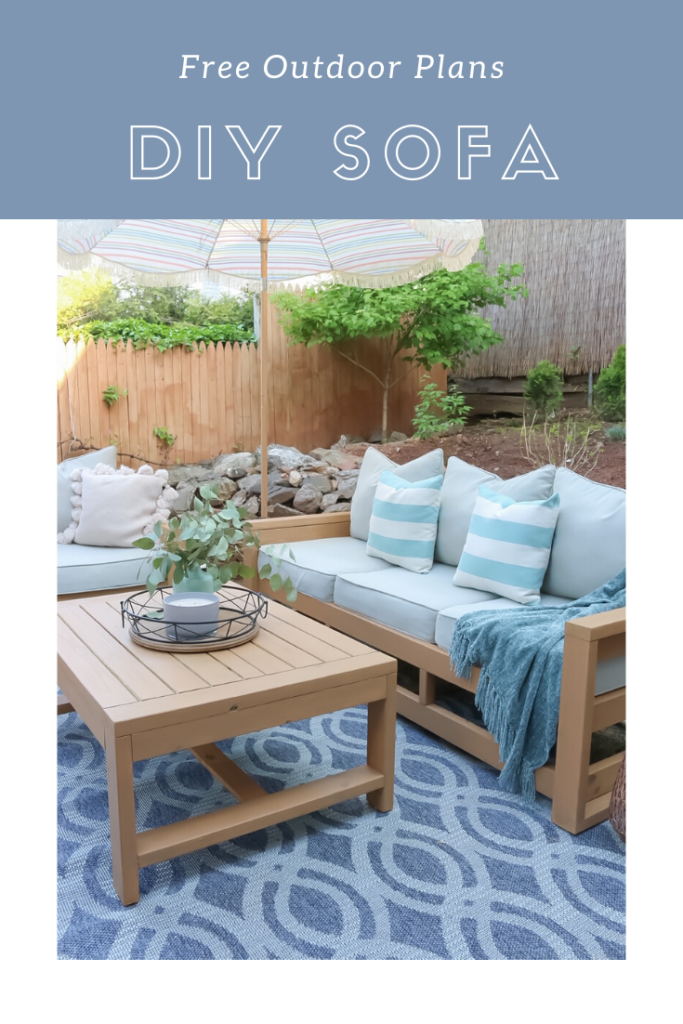
How to Build Your Own DIY Outdoor Couch
Materials (for one couch):
- (16) 2x4x8 ft. (we used pressure treated lumber)
- Waterproof Wood Glue
- (3) Deep Seat Cushion Sets – we used three of these 25×25 seat cushions.
- If you are looking to fit a different size cushion, all the cuts will need to be adjusted accordingly.
- Kreg Pocket Hole Plug (optional in case you want to fill in your pocket holes)
- Wood Filler
- 2-1/2″ Kreg pocket hole screws
- Outdoor Stain – we used Valspar Semi-transparent Exterior Stain and Sealer in the color Quiet Chamois
Tools:
- Miter Saw
- Kreg Jig
- Power Drill
- Tape Measure
- Speed Square
- Pencil
- Safety Glasses
- Ear Plugs
- Rubber Mallet
- Clamps (optional)
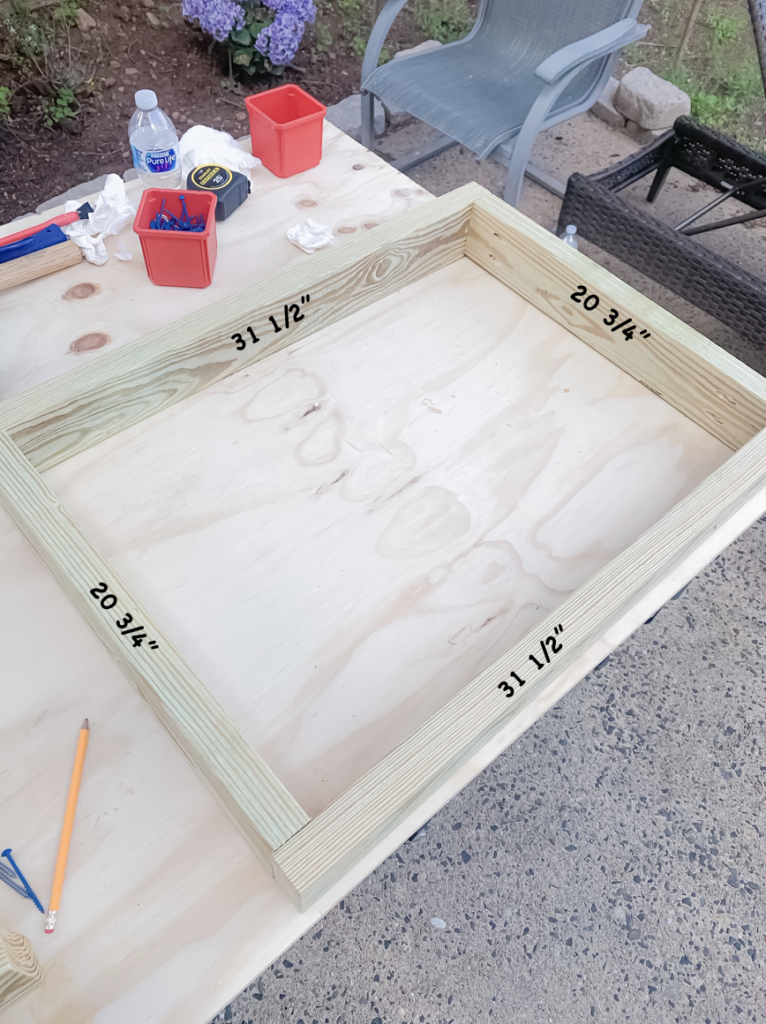
Step 1: Make the following cuts
Use the miter saw to make the following cuts out of the 2x4s:
*These cuts are designed to fit the 25 x 25 Deep Seat Cushions, if you are looking for a different size cushion, make sure to adjust your cuts!
- 11 pieces at 75″ (front & back)
- 6 pieces at 28 1/2” (side frames)
- 4 pieces at 31 1/2” (side frames)
- 4 pieces at 20 3/4” (side frames)
- 2 pieces at 25 1/2″ (inside slats)
- 2 Spacers at 5″ – we then cut them in half and got 4 pieces at 5″to use as support decor (optional)
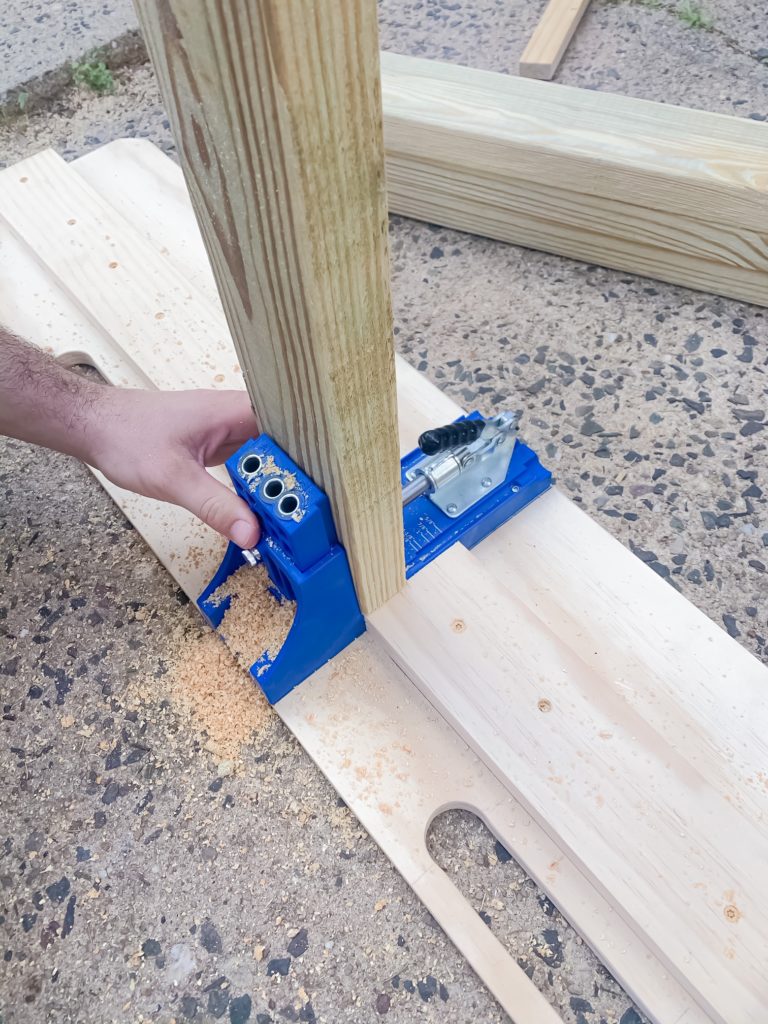
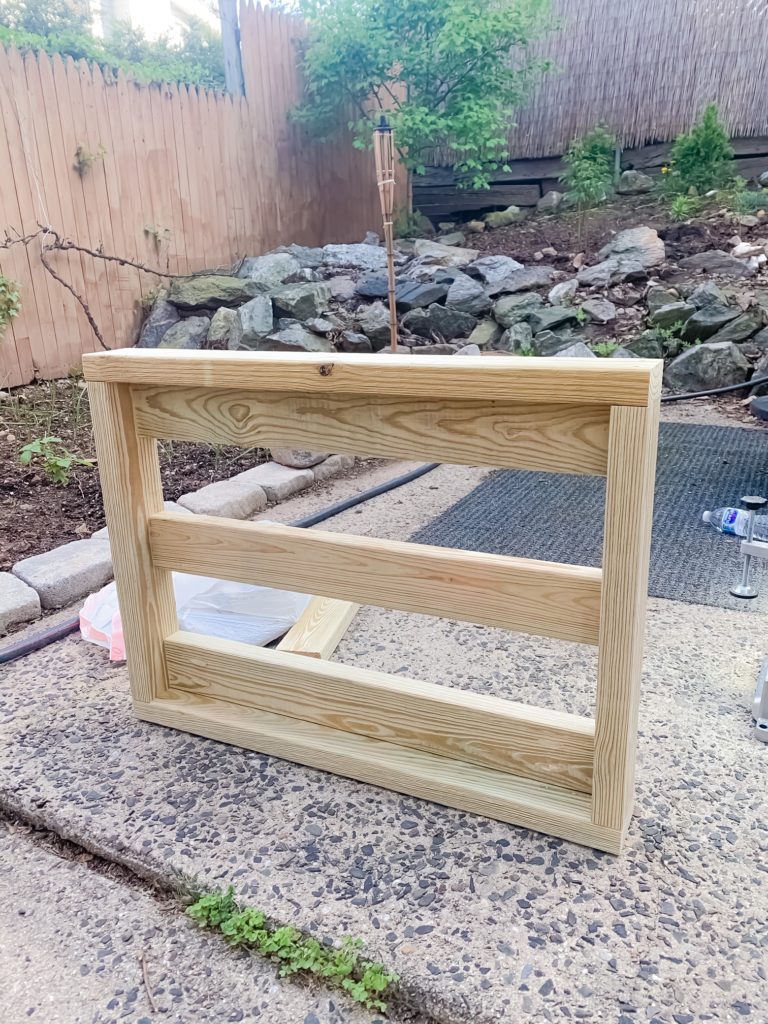
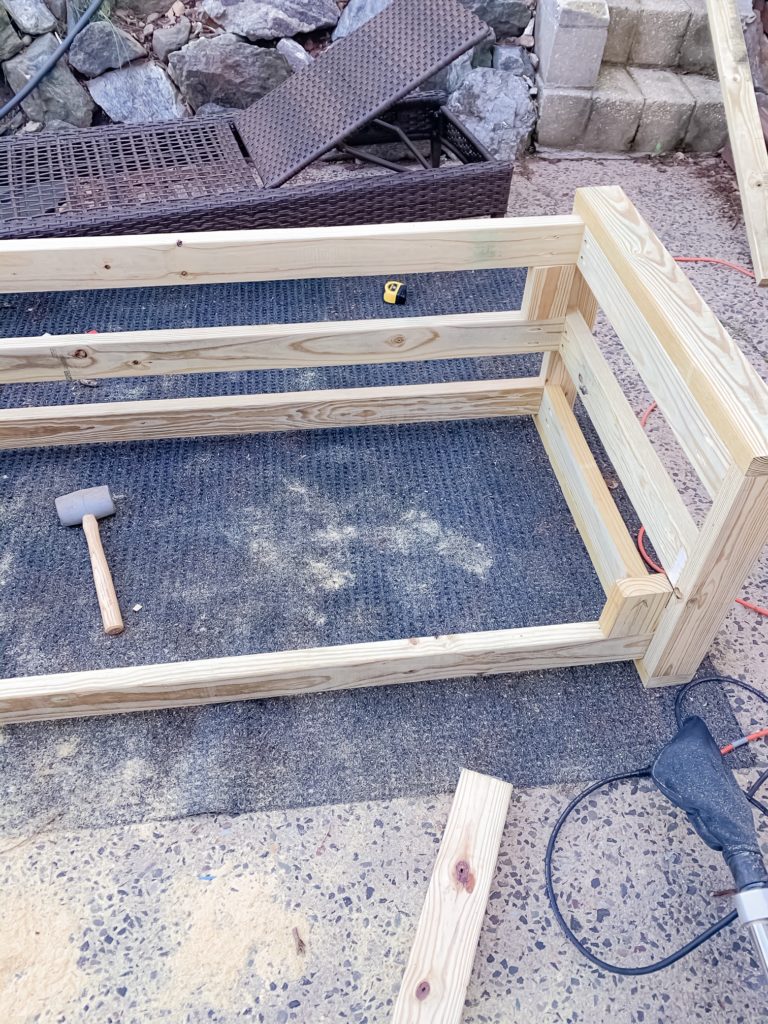
Step 2: Build the side frames
Start out by making making pocket holes on each side of the the 4 pieces at 20 3/4″ and attach with the 2-1/2″ Kreg pocket hole screws as shown below.
For a stronger bond, apply wood glue prior to attaching with pocket hole screws.
Repeat this twice.
Next, make pocket holes on each side of the 6 pieces at 28 1/2”.
Attach as shown below, we used a 5″ 2×4 spacer to ensure the boards were evenly spaced out.
To hide to pocket holes, ensure you assemble the sides as shown below. The pocket holes are faced down (flush with the side frame) as shown in the picture below.
This will be the side of your couch. Repeat the same for the other side.
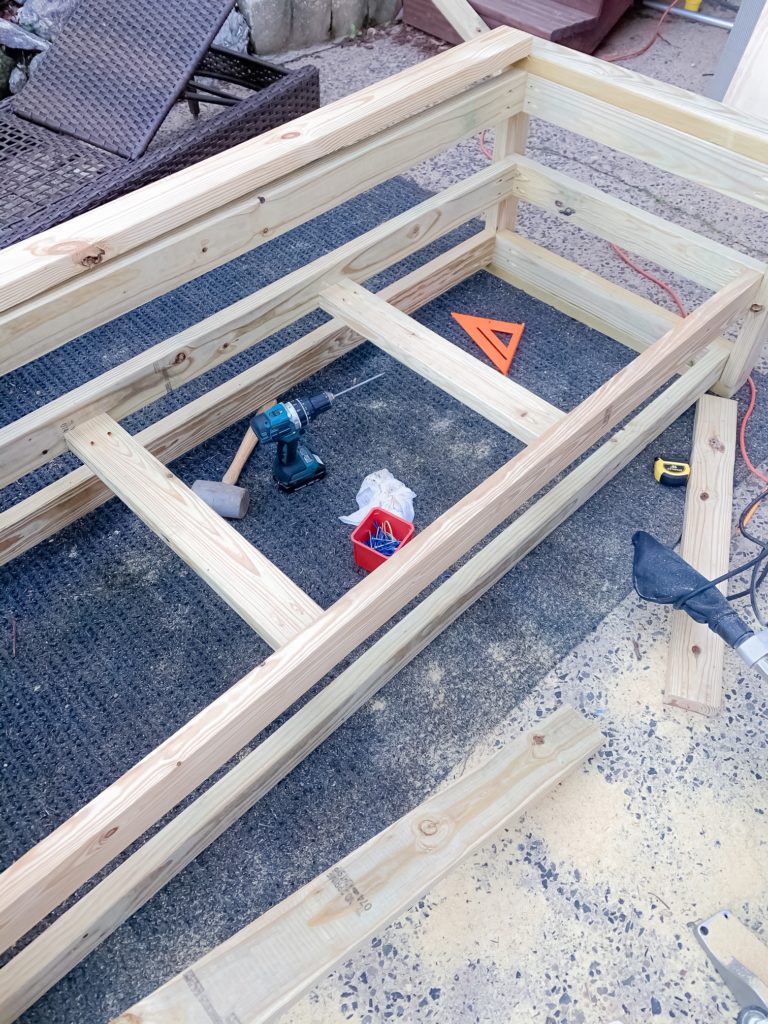
Step 3: Attach the back & the front of the outdoor couch
Make pocket holes on each side of the 5 pieces at 75″.
Attach the 75 inch board to the two sides connecting to the 28 1/2″ board, shown below.
Use the same spacer and connect a total of three board in the back.
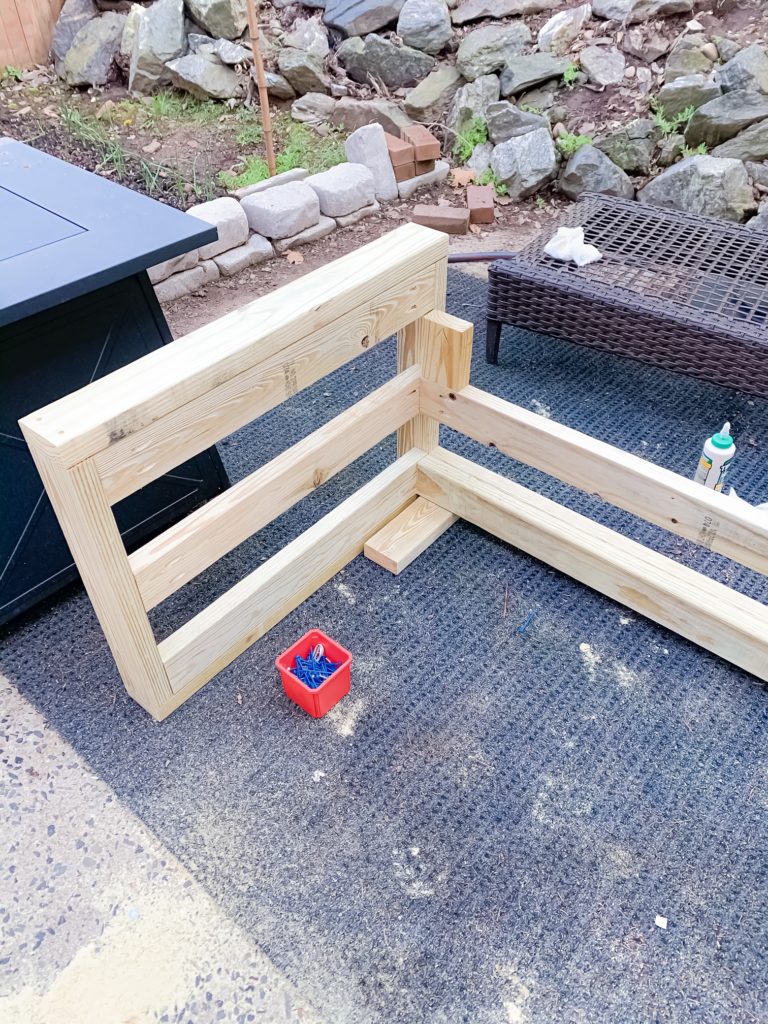
Once the three pieces are connected, connect the two front pieces aligning them with the bottom two front pieces at 28 1/2″ as shown below.
Use the same spacer to help support the board.
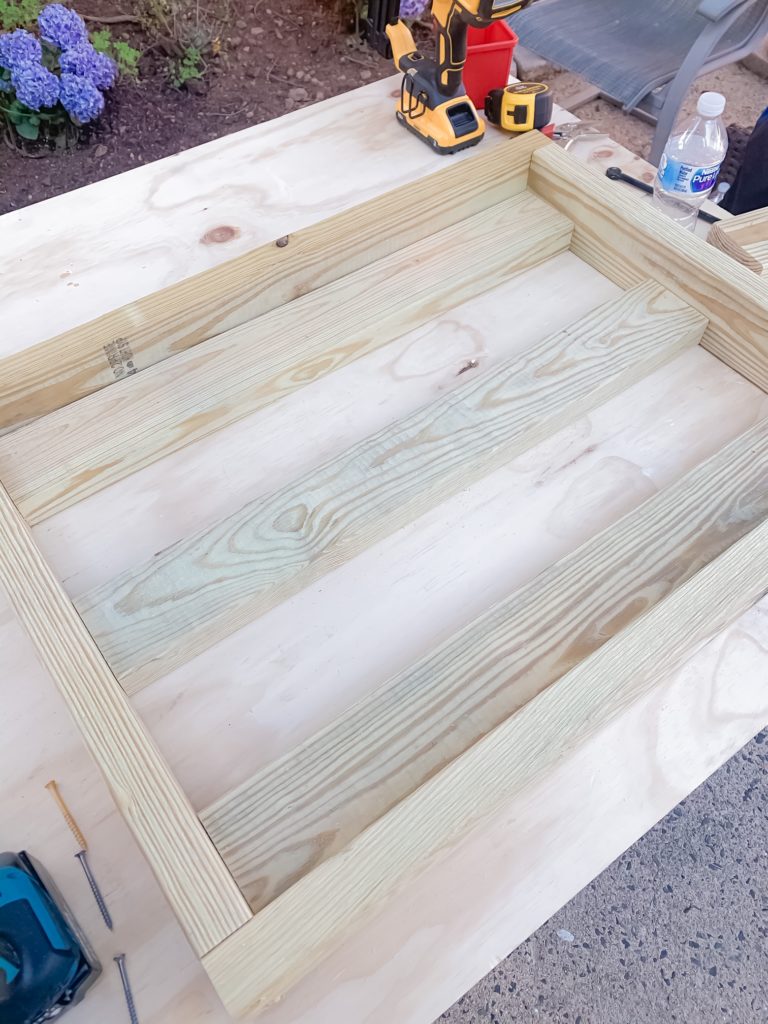
Step 4 – Attach the inside slats
Make pocket holes on each side of the 2 pieces at 25 1/2″.
Attach to the secord board from the bottom at 25″ in between. Refer to the below picture for guidance.
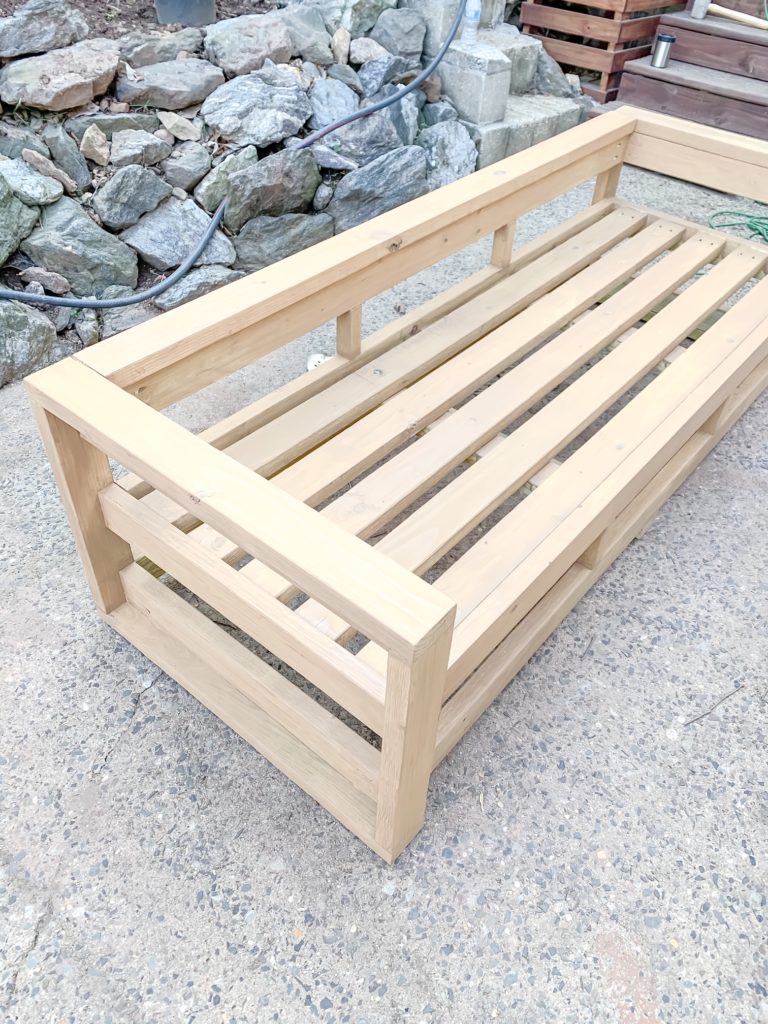
Step 5 – attach the seat slats & the top
Make pocket holes on each side of the 5 pieces at 75″ & attach to the sides of the soda.
The other board at 75″ will be put on the back as the top as seen below (clamped). We did not make the pocket holes on this one. We put 4 screws on the top of the board and filled it with food filler.

Step 6: Optional decorative supports
With the two spacers we used to ensure the wood was evenly spaced, we decided to use them as decorative supports.
We cut each support into 2. We put pocket holes in each of the four pieces and attached them on the top and bottom at 25″ apart.
Step 7: Sand & Stain
The final step and the most important one!
You can sand it by hand, but you will be sanding for quite some time, we used this sander to help make our lives easier!
Once you fully sanded your build, the final product is the stain. There’s so many options out there: transparent, semi-transparent, solid, sealer. Depending on the wood you got for your project, you could just apply oil and seal it for its natural look.
We did a couple of tests, over 10 actually to find our perfect color! We used the Valspar Semi-transparent Exterior Stain and Sealer in the color Quiet Chamois and it turned out beautiful!
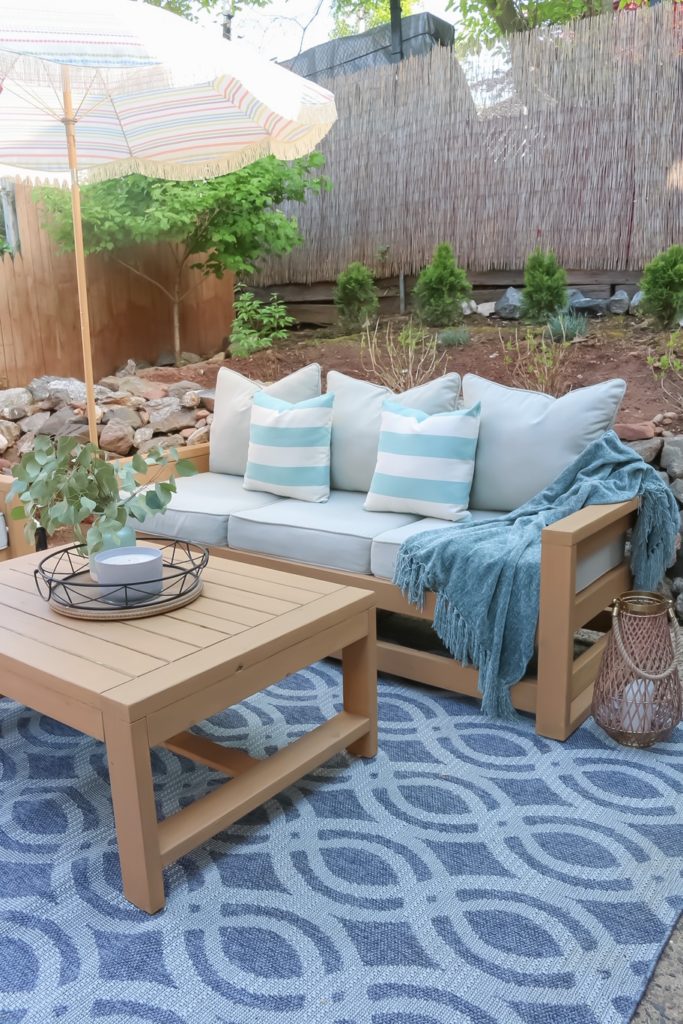
I hope you are inspired by this tutorial and I cannot wait to see how your Outdoor Couch turns out!
If you love this tutorial and want to save it – PIN IT!


What size cushions fit the couch?
We used these ones – https://rstyle.me/+0iPVoHMoKdSlwP7uC54kCA
Hello, do you have the plans for the chair and coffee table as well?
This is by far the best outdoor couch design I have seen, thanks for providing the plan.
Would have the plan for the chair and the table as well?